Implementation of Live2D 3.x Waifu on Hexo-Fluid

作者 nova 在文章中介绍了如何在 Hexo-Fluid 博客主题中集成 Live2D 版本 3.x 的看板娘(虚拟形象)。起初,nova 觉得博客页面过于空旷,于是决定添加一个看板娘。文章详细描述了从最初的准备工作到最终实现的所有步骤。
首先,需要下载 Live2D Cubism SDK for Web 和安装 Node.js 及 TypeScript。接下来,通过修改 Sample 代码导入自定义的 Live2D 模型。具体步骤包括调整模型文件路径、修改文件名与文件夹名一致,并使用 Typescript 编译生成 JS 文件。
在修改模型跟随效果的部分,nova 通过添加鼠标移动事件,实现了看板娘能够跟随鼠标的功能。此外,nova 还详细说明了如何定制看板娘的布局和去除 Canvas 背景,以更好地融合到博客页面。
文章结尾提到了如何解决一些常见问题,例如模型显示不全、无法交互等。这些问题通常需要通过修改源码来解决。nova 建议参考一些已经完成的项目来获得更多灵感和解决方案。
最终,nova 成功在 Hexo 博客上集成并展示了自定义的 Live2D 看板娘,并分享了详细实现过程供读者参考。
I always felt that my blog was too plain, so I wanted to add a virtual waifu or something similar. When I tried to use HEXO-live2d, I found out that it only supports the Cubism2 version of Live2D, and the same goes for others (it seems to be due to commercial copyright issues according to the Issues I checked). I found this SDK on the official website and decided to give it a try by ctrl+c ctrl+v, and surprisingly, it worked! :P
Preparation
-
TypeScript
npm install -g typescript
Getting Started with Customization
Test Steps
Navigate to the \CubismSdkForWeb-x\Samples\TypeScript\Demo folder and run the following commands in the command line:
npm install
npm run build
The official recommendation is to use Visual Studio. The commands may have slight differences, for details please refer to Github.
This process will compile and generate a bundle.js in the \dist\ folder, which will be used to load the Live2D model in the index.html.
Unless specified otherwise, all following paths are assumed to be inside the \CubismSdkForWeb-x\Samples\TypeScript\Demo folder.
Importing Your Own Model
Open the \src\lappdefine.ts file and locate the following code:
export const ResourcesPath = '../../Resources/';

// Model definition---------------------------------------------
// Array of directories where the models are located
// Ensure directory names match model3.json names
export const ModelDir: string[] = ['Haru', 'Hiyori', 'Mark', 'Natori', 'Rice'];
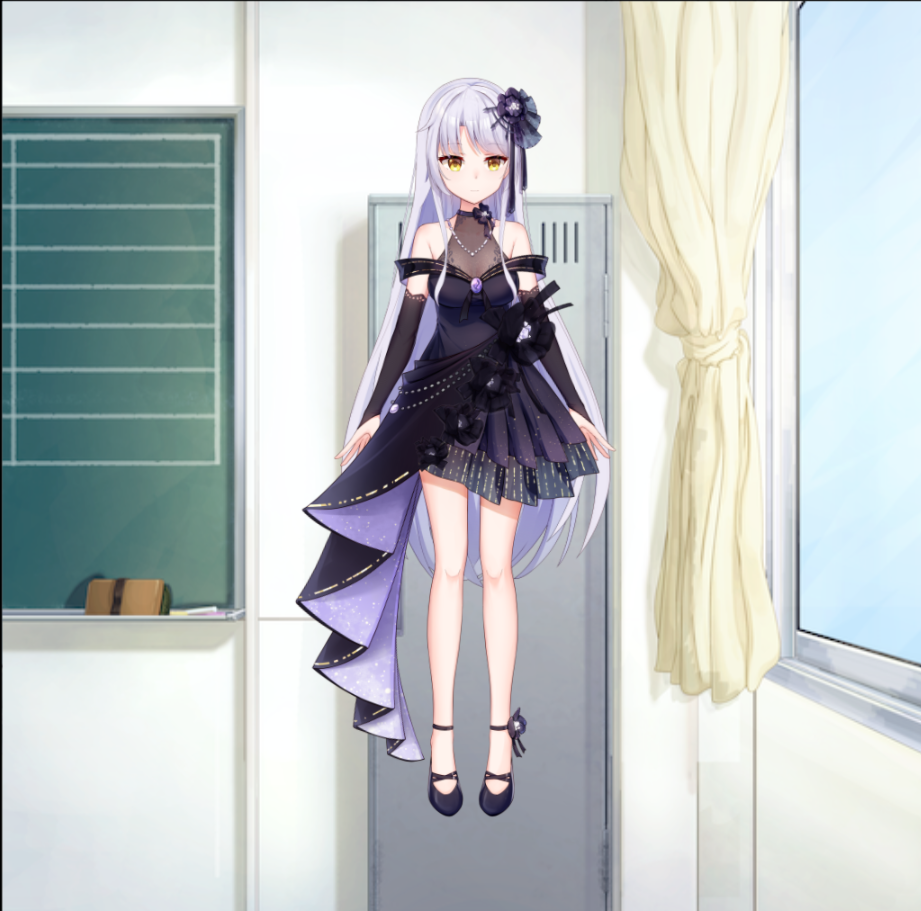
Here, the locations of various Live2D models are defined. To import your model, place it in the ResourcesPath mentioned in the code, which by default is \CubismSdkForWeb-4-r.3\Samples\Resources\, and add the model name to the ModelDir array.
It is important to rename the .model3.json file to match the folder name.
For example, if you place a Nova model in the resources folder with the directory structure as follows:
|
├─Nova
│  │  86.cdi3.json
│  │  86.moc3
│  │  Nova.model3.json
│  │  86.physics3.json
│  │  cc_86.cfg
│  │
│  └─86.4096
│          texture_00.png
├─Other_Models
Rename 86.model3.json to Nova.model3.json. Your directory structure should now look like this:
|
├─Nova
│  │  86.cdi3.json
│  │  86.moc3
│  │  Nova.model3.json
│  │  86.physics3.json
│  │  cc_86.cfg
│  │
│  └─86.4096
│          texture_00.png
├─Other_Models
Ensure that the ModelDir array in your \src\lappdefine.ts file also includes "Nova".
Recompile and run the local server. You should now see the imported model in action.
You can use third-party tools like Visual Studio or WebStorm to open the local server, or run
npm run startin the command line and open the provided link to preview theDemofolder.
Source from oil man's dedication
Modifying Model Movement to Follow Mouse
By default, the Live2D waifu in the SDK only follows when the left/right mouse button is pressed. We will modify it to follow the mouse movement.
Open the \src\lappdelegate.ts file, find the following code:
const supportTouch: boolean = 'ontouchend' in canvas;

if (supportTouch) {
  // Touch-related callback function registration
  canvas.ontouchstart = onTouchBegan;
  canvas.ontouchmove = onTouchMoved;
  canvas.ontouchend = onTouchEnded;
  canvas.ontouchcancel = onTouchCancel;
} else {
  // Mouse-related callback function registration
  canvas.onmousedown = onClickBegan;
  canvas.onmousemove = onMouseMoved;
  canvas.onmouseup = onClickEnded;
}
Comment out and add the mouse movement event:
document.addEventListener('mousemove', function (e) {
  const rect = canvas.getBoundingClientRect();
  const posX: number = e.clientX - rect.left;
  const posY: number = e.clientY - rect.top;
  LAppDelegate.getInstance()._view.onTouchesMoved(posX, posY);
});
// Essentially a copy of onMouseMoved()
You may notice that clicking actions no longer work. Hence, add back the onmouseup event:
Add below the previous code:
canvas.onmouseup = onClickEnded;

// Added an event to reset position when mouse is out of the browser for aesthetics
document.addEventListener('mouseout', function (e) {
  const live2DManager: LAppLive2DManager = LAppLive2DManager.getInstance();
  live2DManager.onDrag(0.0, 0.0);
});
After testing, the functionality should be restored.
Drawing on Canvas
To remove the background from the canvas, open \src\lappview.ts and comment out the image creation method:
public initializeSprite(): void {
    const width: number = canvas.width;
    const height: number = canvas.height;

    const textureManager = LAppDelegate.getInstance().getTextureManager();
    const resourcesPath = LAppDefine.ResourcesPath;

    /*let imageName = '';

    // Initialize background image
    imageName = LAppDefine.BackImageName;

    // Asynchronous, so create a callback function
    const initBackGroundTexture = (textureInfo: TextureInfo): void => {
      const x: number = width * 0.5;
      const y: number = height * 0.5;

      const fwidth = textureInfo.width * 2.0;
      const fheight = height * 0.95;
      this._back = new LAppSprite(x, y, fwidth, fheight, textureInfo.id);
    };

    textureManager.createTextureFromPngFile(
      resourcesPath + imageName,
      false,
      initBackGroundTexture
    );

    // Initialize gear image
    imageName = LAppDefine.GearImageName;
    const initGearTexture = (textureInfo: TextureInfo): void => {
      const x = width - textureInfo.width * 0.5;
      const y = height - textureInfo.height * 0.5;
      const fwidth = textureInfo.width;
      const fheight = textureInfo.height;
      this._gear = new LAppSprite(x, y, fwidth, fheight, textureInfo.id);
    };

    textureManager.createTextureFromPngFile(
      resourcesPath + imageName,
      false,
      initGearTexture
    );*/

	/*if (this._gear.isHit(pointX, pointY)) {
      live2DManager.nextScene();
    }*/
For a transparent background, open \src\lappdelegate.ts and set the background alpha to 0:
  public run(): void {
    // Main loop
    const loop = (): void => {
      // Check for instance existence
      if (s_instance == null) {
        return;
      }

      // Update time
      LAppPal.updateTime();

      // Initialize the screen
      gl.clearColor(0.0, 0.0, 0.0, 0.0); // Change alpha from 1.0 to 0.0
Next is a customization of the Live2D model layout, where the Live2D 2.x version's Live2D project was directly reused.
The
js/live2d.jsin this project is thebundle.jsin thedistdirectory, so some modifications should be made to thedemo.html.
Final Modifications
Open \src\lappdelegate.ts and adjust the canvas in the initialize() method:
public initialize(): boolean {
    // Create the canvas
    // canvas = document.createElement('canvas');
    canvas = <HTMLCanvasElement>document.getElementById('live2d'); // should correspond to the canvas id in custom_html
    if (LAppDefine.CanvasSize === 'auto') {
      this._resizeCanvas();
    } else {
      // canvas.width = LAppDefine.CanvasSize.width;
      // canvas.height = LAppDefine.CanvasSize.height;
    }
...
	// Add the canvas to the DOM
    //document.body.appendChild(canvas);

  private _resizeCanvas(): void {
    // canvas.width = window.innerWidth;
    // canvas.height = window.innerHeight;
  }
Move the cloned live2d folder from Live2D to the source folder of Hexo, and place the previously compiled \dist\bundle.js and \CubismSdkForWeb-4-r.3\Core\live2dcubismcore.js into the source\live2d\js\ folder. Next, locate the _config.fluid.yml file in the root directory of Hexo and find:
# Custom HTML content in the <head> section
custom_head:
Add the following line from demo.html to it:
<link rel="stylesheet" href="/live2d/css/live2d.css" />
Similarly, under the custom_html line, add the following code:
<div id="landlord">
  <div class="message" style="opacity:0"></div>
  <canvas id="live2d" width="280" height="250" class="live2d"></canvas>
  <!-- If you modify the id here, make sure to change the id in the JS as well -->
  <div class="hide-button">Hide</div>
</div>
<script type="text/javascript" src="https://cdn.bootcss.com/jquery/2.2.4/jquery.min.js"></script>
<script type="text/javascript">
  var message_Path = '/live2d/';
  var home_Path = 'https://haremu.com/'; // You can modify it to your homepage link or remove it
</script>
<!-- Change live2d.js to bundle.js -->
<script type="text/javascript" src="./live2d/js/bundle.js"></script>
<!-- Include live2d core -->
<script type="text/javascript" src="./live2d/js/ive2dcubismcore.js"></script>

<script type="text/javascript" src="/live2d/js/message.js"></script>
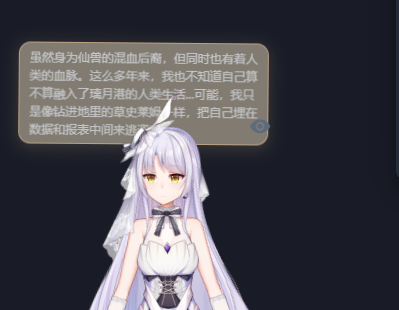
Finally, using the command hexo clean && hexo g, you should now be able to see your Live2D character on the blog.
Other
How to Modify Size and Center Point
After adding the waifu, you might notice it appears very small. To adjust the size, open the \CubismSdkForWeb-4-r.3\Framework\src\math\cubismmodelmatrix.ts file and make changes:
/**
 * Set the width
 *
 * @param w Width
 */
public setWidth(w: number): void {
  const scaleX: number = w / this._width;
  const scaleY: number = scaleX;
  this.scale(scaleX*2, scaleY*2); // Multiply as needed to enlarge
}

/**
 * Set the height
 * @param h Height
 */
public setHeight(h: number): void {
  const scaleX: number = h / this._height;
  const scaleY: number = scaleX;
  this.scale(scaleX*2, scaleY*2); // Multiply as needed to enlarge
}
Recompile bundle.js, place it in the source\live2d\js\ folder, and redeploy Hexo to make it effective.
Epilogue
Simple modifications may not make the waifu perfect. You may encounter issues like incomplete model display, lack of interactivity, or weird mouse following. The solution is to customize the source code as mentioned above. Due to limited resources, it's challenging to cover every aspect comprehensively (after all, the waifu has been deployed for several months when writing this blog).
You can study the project already done by the master to find solutions to most of the aforementioned problems, as they have added many custom methods to enhance the waifu experience, even achieving plug-and-play operation (they even have blogs and videos, so compared to my detailed explanation, I wonder where I'm going with this detailed blogwhere is the significance of spending so much time on writing this blog). You can visit the star-gazing sun to find out more.
The purpose of human existence is to constantly reinvent the wheel!
This Content is generated by ChatGPT and might be wrong / incomplete, refer to Chinese version if you find something wrong.